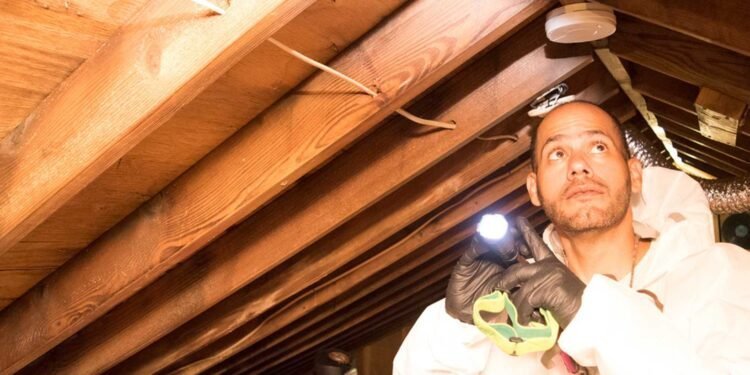
When it comes to maintaining a healthy living environment, addressing a mold problem is not something to be taken lightly. Molds can pose significant health risks if left unchecked, ranging from allergic reactions to more serious respiratory problems. Therefore, preparing your home for a professional mold inspection is a crucial step toward ensuring the safety and well-being of all occupants. A thorough mold inspection involves a detailed evaluation of your home to locate any mold growth, which may be hidden or not immediately apparent.

Prior to the arrival of the inspector, there are specific measures you can take to facilitate a smooth inspection process. Ensuring clear access to areas like the HVAC system, windows, attics, basements, and crawl spaces is essential. It’s also important to maintain the integrity of potential mold sites by avoiding any cleaning or disturbances that might affect the accuracy of the inspection. Knowing what to expect and how to prepare can dramatically improve the efficacy of the inspection and subsequent steps for addressing any identified mold issues.
Key Takeaways
- Mold inspections are critical for healthy indoor environments and identifying hidden mold.
- Preparation involves providing clear access to potential mold areas and maintaining their condition.
- Understanding what occurs during an inspection helps homeowners take the right post-inspection steps.
Identifying Potential Mold Issues

When preparing for a professional mold inspection, homeowners should be able to identify potential mold issues. Recognizing the visual signs, understanding common moisture sources, and being aware of health symptoms can help in addressing mold problems effectively.
Visual Indications of Mold
Mold may manifest as discoloration on various surfaces, such as walls, ceilings, and floors. It often appears as spots that can be black, white, green, or even yellow. Homeowners may also notice peeling or bubbling paint, as well as warped or bulging materials, which can indicate moisture problems and the potential presence of mold beneath.
- Visible Mold: Stains or discolorations that are irregularly shaped.
- Deterioration: Signs of material compromise, like damp areas or rotted wood.
- Musty Smell: A persistent earthy or foul odor that suggests mold spores may be present.
Common Sources of Moisture
Mold growth thrives in moist environments. Identifying common sources of moisture can help prevent mold proliferation.
- Leaks: Regularly inspect locations prone to leaks such as roofs, pipes, and windows.
- Condensation: Areas with high humidity levels can lead to condensation, which supports mold growth.
- Ventilation: Poorly ventilated spaces, such as bathrooms and kitchens, can accumulate moisture and foster mold spores.
Health Signs of Mold Exposure
Health effects can also serve as signs of mold issues in a home. Individuals with allergies or respiratory conditions may experience increased symptoms when exposed to mold.
- Allergic Reactions: Sneezing, runny nose, red eyes, and skin rash can suggest mold exposure.
- Respiratory Issues: Difficulty breathing, wheezing, or coughing can be exacerbated by the presence of mold spores.
By paying attention to these indicators, homeowners can take proactive steps to minimize health risks and prepare effectively for a professional mold inspection.
Preparing Your Home for Inspection

Before a professional arrives to conduct a mold inspection, homeowners should ensure easy access to areas where mold could be present and minimize variables that could obscure problem areas. Proper preparation helps in identifying potential mold infestations in the home accurately.
Creating Access to Potential Mold Areas
One must provide clear access to areas such as HVAC systems, crawl spaces, and other locations where mold is likely to grow unnoticed. It is crucial to:
- Relocate furniture: Move any furniture or storage containers that may block access to walls, air vents, or other critical inspection points.
- Clear ventilation shafts: Ensure all vents, including those in the bathroom and kitchen, are unobstructed.
Specific tasks include:
- Checking around HVAC units: For accurate assessment, remove any blockages around HVAC systems that could hide signs of mold.
- Opening up crawl spaces: Clear the entrances to crawl spaces to allow the inspector to assess for hidden mold without obstructions.
Minimizing Dust and Moving Obstacles
Reducing dust and moving potential obstacles not only aids in the mold inspection but also limits the spread of spores during the process. Key actions include:
- Cleaning: Gently wipe surfaces with a damp cloth to reduce dust without spreading mold spores.
- Securing loose items: Ensure that any loose items that could hinder movement around the inspection area are safely put away.
Inspectors require both visibility and accessibility to provide a thorough evaluation of the property for any signs of mold infestation. By following these steps, one can facilitate a more precise and efficient mold inspection.
Understanding the Mold Inspection Process

When preparing for a professional mold inspection, it is important to understand that the process generally involves an in-depth visual examination and various methods for collecting samples that will be sent to a laboratory for further analysis. These steps are critical for detecting the presence and extent of mold growth in your home.
Visual Assessment by a Professional
A mold inspector conducts a visual inspection to identify visible signs of mold and moisture issues within the property. They inspect various areas, including walls, ceilings, and floors, as well as less visible spots that may harbor mold. Their expertise allows them to detect signs of mold that homeowners might overlook.
Sampling Methods and Laboratory Analysis
The mold test typically includes sampling, which can be done through air sampling or surface sampling. Samples gathered are sent to a laboratory for analysis to identify mold species and quantify mold spore concentration.
- Air Sampling: This process involves capturing air from various locations in the home to assess the concentration of mold spores in the atmosphere.
- Surface Sampling: This involves collecting samples from surfaces to determine if there is mold growth and what types of mold are present.
After testing, the inspector prepares a detailed report outlining the findings, including the types and concentrations of mold present, which is essential for subsequent remediation efforts.
Interpreting Mold Inspection Results

After a professional mold inspection is conducted in a home, the results can provide significant information about the presence and severity of mold infestation. Correctly interpreting these results is crucial for planning any necessary mold remediation and understanding potential health risks.
Types of Mold and Associated Risks
There are countless types of mold, but common species such as Cladosporium, Penicillium, and Aspergillus often appear in homes. Each mold type can pose different levels of health risks. For instance, Stachybotrys chartarum, frequently called “toxic mold,” can cause serious health issues if not addressed promptly. Mold inspection procedures often involve taking samples of these types to a lab for analysis to determine the specific strains present.
| Common Mold Types | Associated Risks |
|---|---|
| Cladosporium | Respiratory issues; common allergen |
| Penicillium | Allergic reactions; potential antibiotic properties |
| Aspergillus | Can produce mycotoxins; respiratory infections in immunocompromised individuals |
| Stachybotrys | Toxic mold”; can cause serious health effects |
Reading and Understanding the Report
Once samples are collected and analyzed, the mold inspection results are compiled into a report. Understanding this document is critical to gauge the implications of the findings. Generally, the mold test report will highlight concentrations of spores per cubic meter of air and surface sample results. Elevated levels indicate a higher concentration of mold, signaling a need for mold remediation.
The report should clearly list the identified type of mold, giving you an idea of the potential health risks and the urgency of addressing the issue. It is essential to understand that not all molds are toxic, but any significant mold growth can impact indoor air quality and thus requires attention.
Post-Inspection Steps and Mold Remediation
After a professional mold inspection, identifying the mold issues is just the start—one must ensure the problems are rectified to prevent mold from returning. The following steps are essential in addressing the conditions that allowed mold to grow and ensuring that it is safely removed from the home.

Fixing the Underlying Moisture Problem
The fundamental cause of mold growth is excess moisture; therefore, fixing leaks and moisture problems should be the homeowner’s first priority. Whether the issue stems from plumbing leaks or a lack of ventilation, it’s imperative to identify and rectify these problems before proceeding with mold remediation. Utilizing dehumidifiers can help control the humidity levels in the home, thus discouraging mold growth.
- Identify all sources of leaks and moisture.
- Repair any plumbing issues.
- Optimize ventilation, particularly in areas like bathrooms and kitchens.
- Consider investing in dehumidifiers for consistent moisture control.
Choosing a Mold Remediation Company
Selecting the right mold remediation company is crucial for thorough mold removal and to ensure it doesn’t reoccur. Homeowners should look for companies with certified professionals experienced in handling various mold situations. A reputable company will not only remove existing mold but also offer solutions for keeping the home mold-free in the future.
- Verify credentials and certifications of the mold remediation company.
- Ask for a detailed plan and estimate for the mold removal process.
- Ensure the company has a strategy to address future mold prevention.
By taking these post-inspection steps seriously, one can maintain a mold-free and healthy living environment. Addressing moisture problems and choosing a capable mold remediation company are non-negotiable aspects of responsible home maintenance.
Frequently Asked Questions

Engaging a professional for a mold inspection is a critical step in ensuring the health and safety of one’s living environment. These frequently asked questions are intended to clarify the preparation, process, and expectations involved in a mold inspection.
What steps should I take to get my house ready for a mold inspection?
To prepare for a mold inspection, homeowners should shut off any humidifiers or air purifiers 24 hours before the appointment to ensure a more accurate assessment of the air quality. Ensuring access to areas like basements, attics, and behind appliances is also critical, as is avoiding any cleaning or disturbance of potential mold sites.
How long should I expect a mold inspection to take when it’s scheduled?
The duration of a mold inspection can vary, typically ranging from a couple of hours to a full day, depending on the property’s size and the extent of the mold growth.
Where can I obtain a mold inspection at no cost?
While professional mold inspections generally incur a fee, some local health departments, housing authorities, or university extension programs may offer mold inspection services at no cost, mostly for low-income residents or in areas impacted by natural disasters.
Can you explain the process and purpose of a mold inspection?
A mold inspection involves a thorough visual examination and often the collection of air and surface samples to identify the presence and type of mold. The purpose is to uncover mold issues, determine the severity, and develop an appropriate remediation plan.
What are the methods professionals use to detect mold in a home?
Professionals detect mold using a combination of visual inspections, moisture meters, and collecting air and surface samples for laboratory analysis. Infrared cameras may also be employed to identify hidden moisture that could encourage mold growth.
Is it necessary for me to be present during the mold remediation process?
Homeowners are not required to be present during the remediation process, but they may choose to be available to provide access to the property and to discuss findings with the remediation team as the process unfolds.


